Hardware
System initializations
- Power Connection
Lidars All the Lidars and their corresponding power wires are labeled with stickers. The input voltages of the Lidars are 12V. For our current laptop powerbanks, please only connect at mmost 1 Lidar to each power banks, otherwise the output voltage will be unstable, which might lead to unstable sampling frequencey.
Router The power wire of the router is labeled and its voltage is also 12V. It can be connected in parallel with any of the lidars.
Xavier The power wire of Xavier is labeled and its voltage is 20V. It should be connected on a seperate power bank.
- Data Transfer Connection
Lidars Each lidar is connected to the router with a ethernet cable respectively
Xavier The processor is connected to the Lidars via the router through ethernet cable.
Camera The ZED2 camera is connected to the processor via USB.
Chassis The chassis is connected to the processor via USB in CAN protocol.
- Remote Controller Connection
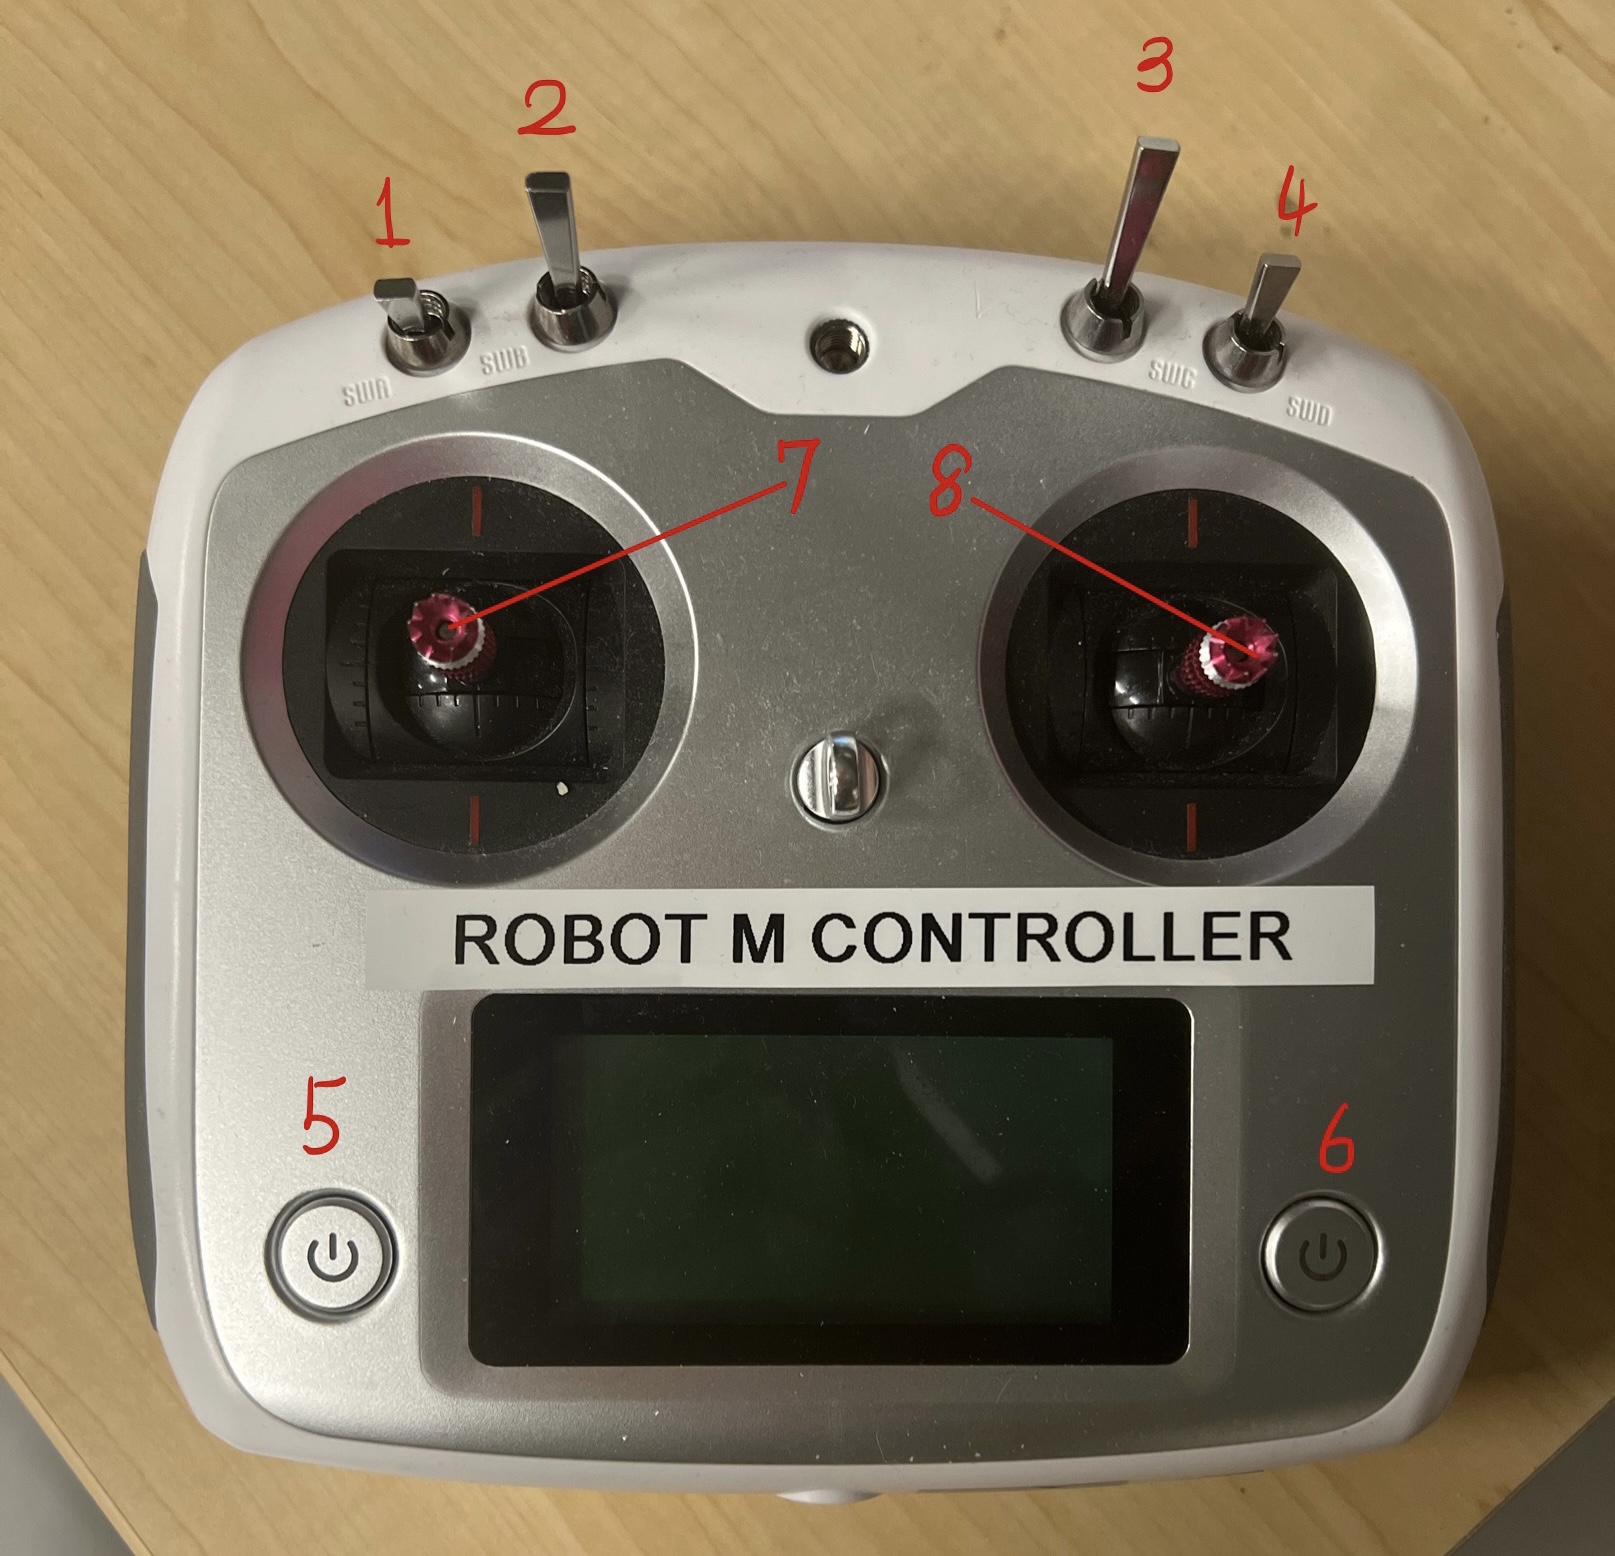
As is shown in the following figure, the buttons and joysticks are labeled with numbers. To turn the controller on and connect the chassis, follow these steps:
Flip lever 1, lever 2, lever 3 and lever 4 to the top
Hold button 5 and button 6
Flip lever 1 to the bottom and lever 2 to the middle.
Turn on the chassis and wait for connection in approximately 5 seconds.
Detailed Manual can be found here, the configuration of the controller can be found here
Lidar and camera drivers
cd pc_ws
sudo ifconfig eth0 192.168.1.50
sudo ptp4l -l eth0 -l -6 -m
sudo phc2sys -c eth0 -s CLOCK_REALTIME -o 0